LINOCUT

Sometimes linocut printing is also called block printing, which traditionally uses carved wood relief stamps. Rubber based lino is easy to carve and has a bold hand-made look!
When you get more adventurous, try multiple colour linocut! Belinda Del Pesco has created a fabulous five-minute video on how to create a multiple colour print in lino.
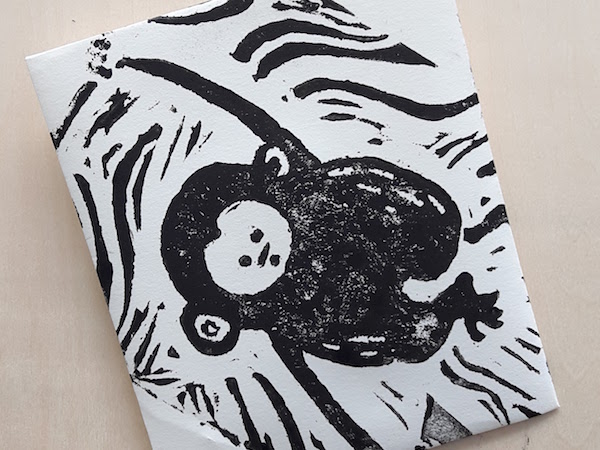
A Chinese New Year linocut by one of my expecting students - all the best with her little 'monkey' this year!
TIPS & TECHNIques
Lino is great fun! Some of the techniques listed here are for paper and some are for fabric.
1. Fabric/Paper Preparation
Choose a strong but thin type of paper. Ensure that it is larger than your piece of lino by at least about an inch or so. Choose acid free paper if you don’t want your prints to eventually yellow.
For fabric, it's best to stick to natural fibres. A rougher texture of fabric will add a different look to your print.
2. Tracing
Trace the edge of your lino block and then draw your design inside it using a very soft pencil such as 3B.
3. Transfering your image
Turn the tracing paper over and use masking tape to secure it to the lino block.
Use a metal or timber spoon to burnish the back of the paper. A sheet of greaseproof paper can also be used in between for smoother burnishing. The carbon of the pencil should transfer to the lino block. You may also retouch your lines with a felt-tip pen or simply draw freehand on the block. Remember that the eventual image will be reversed!
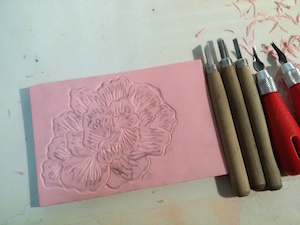
4. Cutting
Now the fun part! But if you want to practice first, go ahead – use a spare block and carve similar shapes and images that you will have on your ‘good’ block.
Remember to cut smooth strokes away from you while keeping your other hand in a safe place in case you slip. Aim for an even area of negative and positive space.
5. Registration
Lay your registration graph paper down with the clear acetate on top. Stick both to the table with masking tape. Place your paper nearby and make some space to lay your prints out to dry once they are printed.
6. Printing –Inking Up
Get your apron on and clean your hands since you’ll be handling paper. Use stiff squares of paper folded into a little triangle to handle paper if you are worried about paw prints.
Use a small piece of lino and spread an even ‘line’ of ink at the top of your inking area.
Dauber: You can use a home-made dauber instead of a brayer - especially while you are still getting the hang of linocut printing. More about daubers to come!
Brayer/roller: Roll upward and sideways to get an even layer of ink. Listen to the sound of sticky ink – have you got too much? Not enough? A tacky sound that is not too loud is what you are after…this might take a bit of practice! Roll ink across your block upwards and sideways a few times. Your last stroke should be the one that covers the entire face of the block to ensure there are no roller lines of ink. Read more about choosing a brayer. This video by Speedball demonstrates fabric printing but it also covers how to use a brayer. Make sure to always rest your brayer upside down on the bench - this stops it from developing a harsh line across your brayer that will show when you come to ink up the next time! Here is a very handy PDF by Van Stamp News on how to use a brayer.
7. Printing –Burnishing
Lay your plate down. Make sure your acetate sheet is clean. Lay your paper on top and gently press down with the palm of your hand to ensure the ink has grabbed the paper in place (so it won’t shift).
Spoon: Use a spoon in small circular movements to burnish the plate.
Brayer: You can also use a clean brayer to roll the back of the paper.
Peel off from the short end. Take note where you have:
- Too much ink (image has filled in or the carved areas are too shallow)
- Patchy or speckled areas (not enough ink or burnishing too light)
8. Signing
From left to right, you could write the edition number (1/10 etc), title, signature and date.
9. Showing off your print
Yes – go ahead! You deserve it. And make you go into detail about how you produced your masterpiece when someone next asks!
LINOCUT/BLOCK PRINT - Tools & MATERIALS

LINO
I've used the following lino types that are all available in Singapore. Please note that this is just my opinion.
Pink Speedy-Carve by Speedball: Best for beginners. It's easy to carve and you can use both sides. (not shown in photo below). Available from Art Friend.
Red/blue type: Good for those who like to see what they are carving as the core of the block is a different colour and will show when carved. Best for intermediate students as the surface is slippery.
Cream Speedy-Cut by Speedball: Expensive and tends to crumble easily.
Grey type: Cheap and easy to use but tends to crumble.
Traditional brown linoleum: Great for fine lines but not easy to cut. For extended use, you may have to glue it to a timber board as it tends to curl.
Pencils
Use 4B or 5B when tracing to ensure there is enough carbon to rub off onto your block later.
TRACING PAPER
Try to buy the best you can afford. Sometimes the cheaper types tear easily.
Paper
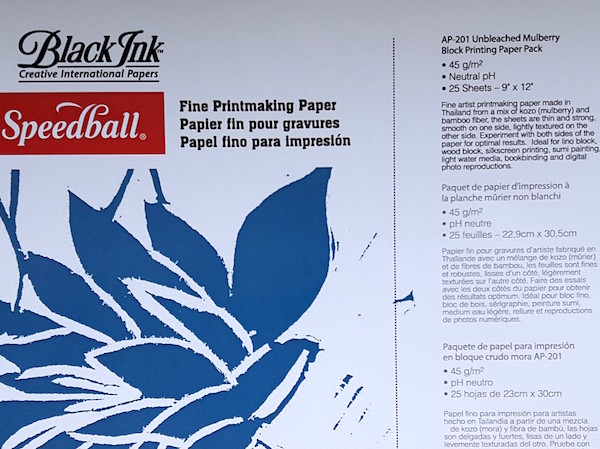
Acid-free and under 120 gsm (paper thickness) is good. Smoother is usually better although a textured paper can give an interesting effect. Otherwise a similar pad of paper in a convenient size means you can avoid having to cut each sheet of paper. For example, a 10x15cm piece of lino fits nicely on an A5 size piece of paper. You can also use normal photocopy paper when you are proofing (checking what the block looks like before you use more costly paper). Once you've gained confidence, you could move onto Mulberry paper - very forgiving and gives a gentle look. Available from Art Friend.
Ink
Paper printing: Speedball Block Printing Ink is available in many colours. You may like to use Transparency Medium for a gentle look, and Ink Retarder to slow down the drying time – sometimes a problem when using waterbased inks. Available from Art Friend.
Fabric printing: Speedball Screen Printing Ink can be heat-set with an iron to ensure your textile item is colour-fast in the wash. Available from Art Friend.

Brayers/Roller
Paper printing: Speedball also has brayers, and there are cheaper no-brand types. Essdee seems to be middle of the road. A softer brayer makes applying ink easy but it can get into the grooves and cause bleeding. Harder brayers are best for work with detailed lines, but you need to be careful not to end up with rolling lines caused by the edge of the brayer.

Barren
For paper, try using the back of a metal spoon. For fabric printing, Speedball also has a handy timber handle barren.
Carving tools
Essdee Lino Handle & 5 cutters: this is a good set for starting out.
Tombo carving 5 set: these can be resharpened. Only available at Straits Arts.
You may also like to look at Japanese woodblock carving tools at McClains Printing Supplies. Otherwise Pfeil linocut tools are suitable for the more advanced level. Jacksons Art sell them and other printmaking supplies and deliver worldwide.
Inking plate
Speedball (available at Art Friend) has a combined bench hook/inking plate. You can also use a hard sheet of pvc on a smooth table surface, or preferable a piece of mirror/glass. It's always good to tape down your plate to stop it dancing around. You'll see discover for yourself!

Also:
- Cotton buds are useful for digging out the occasional bit of fluff that has fallen on your ink.
- Cutting up old lino blocks to use as scrapers.
- Acetate sheet (overhead transparency sheets can be used) for registration.
- Using graph paper as your registration sheet can help accuracy.
- Keep a supply of clean damp cloths nearby to help keep things clean!
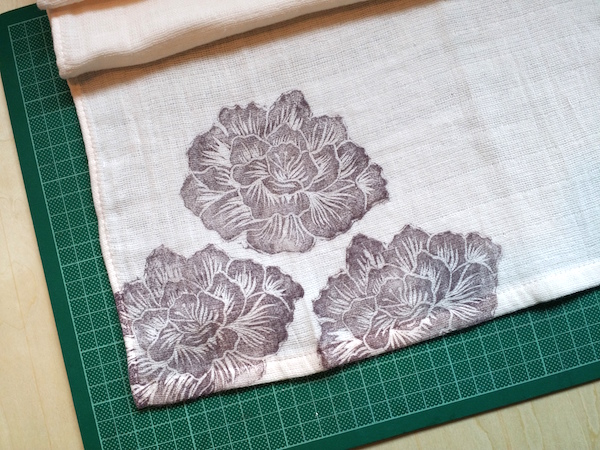
Block printing on FABRIC
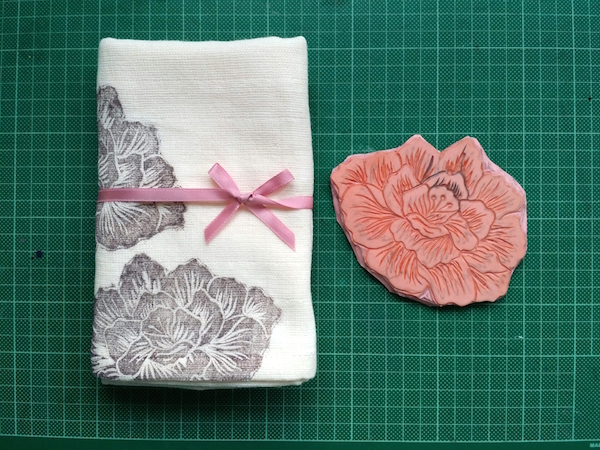
Once you've made your gorgeous fabric, now it's time to show it off! Look at the things you can make with fabric artwork.
No-sew Cushions - easy way to create some home furnishing items.
Furoshiki Wrapping Cloths - Japanese know how to perfectly package things! An eco-friendly way to wrap gifts and decorate your home.
Suppliers (SINGAPORE)
· Art Friend (Bras Basah Complex near City Hall)
· Straits Art (near Bras Basah Complex on North Bridge Road)
Linocut Artists
- Australian Artist Lynette Weir
- UK Artist Andrea Lauren
- Nick Morley - Linocut Boy